۱۳۸۸ مرداد ۳۱, شنبه

مکعب ۳ بعدی در لینوکس

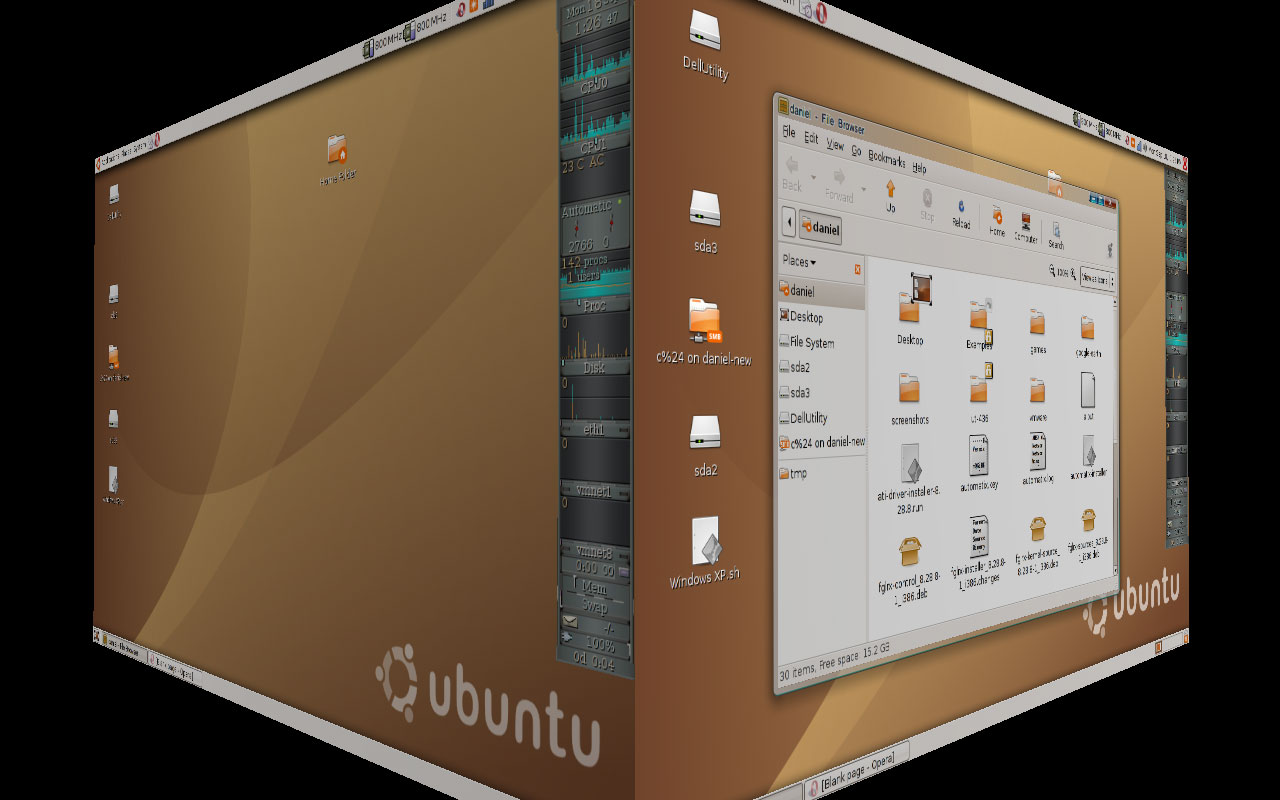
مکعب لینوکس که در حقیقت مدل گرافیکی بهتری برای میزکارهای متعدد در لینوکس است به صورت پیش فرض غیر فعال است. اگر شما مایل هستید این مدل فعال شود باید مکعب لینوکس را با روش زیر فعال کنید.
(این آموزش قدم به قدم برای اوبونتو میباشد و در دیگر نسخه های لینوکس مانند فدورا و .. ممکن است کمی تفاوت داشته باشد)
۱. به System -> Administration -> Synaptic Package Manager رفته و عبارت "compizconfig-settings-manager" را جستجو کنید.
۲. "compizconfig-settings-manager" را نصب کنید
۳. به System -> Prefrences -> Compizconfig Settings Manager رفته و گزینه ی Rotate Cube را در حالت فعال قرار دهید.

اکنون میتوانید با فشردن همزمان Ctrl + Alt و کلید سمت چپ ماوس از میزکاری به میزکار دیگر در حالت گرافیکی ۳ بعدی بروید.


عکس از : Linux Forums

۱۳۸۸ مرداد ۲۹, پنجشنبه

Adding Persian keyboard to Ubuntu | افزودن صفحه کلید فارسی در اوبونتو

برای اضافه کردن زبان فارسی به اوبونتوی خود میتوانید از این روش استفاده کنید. از روی نوار بالا آدرسی که در پایین می آید را دنبال کنید
System -> Prefrences -> Keyboard
سپس layout را برگزیده و از آنجا بر روی دگمه افزودن کلیک کنید.
با انتخاب ایران صفحه کلید فارسی را انتخاب کرده و اضافه کنید(برای دوستان افغانی افغانستان همان گزینه ی اول است). پس از افزودن ایران روی دکمه ی layout Option کلیک کنید
در زیر گزینه ی Key(s) to change layout یک ترکیب مورد نظر را برای تغییر از یک صفحه کلید به دیگری انتخاب کنید(انگلیسی به فارسی و برعکس). ترکیب من Ctrl + shift هست و شما میتوانید بر حسب دوست داشتن ترکیب خودتان را برگزینید.
سپس بر روی دکمه ی بستن کلیک کرده و این با روی دکمه ی Apply system wide کلیک کنید و حالا میتوانید با بستن صفحه از صفحه کلید فارسیتان هر زمانی که دوست دارید بهره ببرید

۱۳۸۸ مرداد ۱۹, دوشنبه

دستورها و ترفندهای ویژه در تالارهای گفتمان آی آر سی

دستورها و ترفندهای ویژه در تالارهای گفتمان آی آر سی
IRC CHAT
/join
Type /join #channelname -- to join a channel of your choice
Example: /join #bossmom
What it looks like:
[18:44] *** Now talking in #beginner
--Op-- bossmom has joined the channel
[18:44] *** Topic is 'Beginner's Help/Chat Channel....All Are Welcome Here!! ®© [ENGLISH]'
[18:44] *** Set by X on Sun Jul 23 16:10:34

/me
The /me is an action message.
Type /me 'does anything'
Example: /me waves hello
What it looks like:
* bossmom waves hello

/msg
Type /msg nickname (message) to start a private chat.
Example: /msg puddytat Hey tat, how are you?
What it looks like:
-> *puddytat* Hey tat, how are you?

/nick
/nick changes your nickname
Example: type /nick newnickname (limit 9 characters)
What it looks like: I typed /nick luv2quilt
*** bossmom is now known as luv2quilt

/notice
A notice is used to send a short message to another person without opening up a private window.
Type /notice nickname (message)
Example: /notice badnick Please change your nickname for this family channel.
What it looks like:
-> -badnick- Please change your nickname for this family channel.
/part
Type /part -- to leave one channel
Type /partall -- to leave all the channels you are in

/ping
Type /ping nickname. What this command does is give you the ping time, or lag time, between you and the person you pinged. Lag can be explained as the amount of time it takes for you to type your message and for others to read your messages. Unfortunately, lag is always a part of IRC, although most times it's not a problem, just a nuisance.
Example: /ping luv2quilt
What it looks like:
[19:04] -> [luv2quilt] PING
[19:04] [luv2quilt PING reply]: 0secs

/query
Similar to the /msg, except it forces a window to pop open.
Type /query nickname (message)
Example: /query Sofaspud^ Sooo....what's new?
What it looks like:
soooo....what's new?

/quit
Type /quit to leave IRC altogether. This disconnects mirc from the server.
Example: /quit Going out for dinner...nite all
What it looks like:
*** Quits: saca (Leaving)

/ignore
Unfortunately, there will be times when you don't want to talk to someone, or else someone may be harassing you.
By typing /ignore nickname 3, you will not receive anymore messages from that person.
Example: /ignore luv2quilt 3
To Unignore them, type /ignore -r luv2quilt 3
What it looks like:
*** Added *!*bossmom@*.dialup.netins.net to ignore list
*** Removed *!*bossmom@*.dialup.netins.net from ignore list

/whois
Type /whois nickname to see a bit more information about another user. You'll see what server another person is using, or what their ISP is. Pretty helpful when you don't recognize a nickname that wants to chat. You may recognize the IP, (Internet Protocol) and then feel more comfortable carrying on a conversation. You'll also be able to see what other channels a person is in, which might be a good indicator if you really want to talk with them or not.
Example: /whois bossmom
What it looks like:
luv2quilt is bossmom@elwo-01-094.dialup.netins.net * Enjoy the Journey........
luv2quilt on @#bossmom
luv2quilt using Seattle.WA.US.Undernet.org the time for school is during a recession.
luv2quilt has been idle 18secs, signed on Sun Jul 23 18:47:26
luv2quilt End of /WHOIS list.

/chat
This opens up a DCC/CHAT window to another user. What's nice about these is that you can continue to chat even if you get disconnected from your server.
Word of Caution: Do NOT accept dcc/chats nor dcc/gets from anyone that you don't know.
Type /chat nickname.
Example: /chat oddjob^
What it looks like:
Chat with oddjob^
Waiting for acknowledgement...

/help
There's one more very helpful command, and probably the one you'll use a lot when first starting out. In fact, I still use it quite a lot, and that's the built-in help menu of mIRC.
Type /help, you'll see the the mIRC Help Menu open up. You can do a search from there, or you can type /help topic. Either way, a TON of information at your fingertips.
Example: /help Basic IRC Commands

۱۳۸۸ مرداد ۱۳, سه‌شنبه

تغییرات مفید در جستجوگر تصاویر گوگل

Google Images

این بار نوبت به جستجوگر تصاویر گوگل است که دست خوش تغییراتی شود. کمپانی گوگل که اکنون بزرگترین شرکت فعال در زمینه اینترنت است طی مطلبی در وبلاگ رسمی خود, اقدام به معرفی تعدادی امکانات جدید برای جستجوگر تصاویر خود کرد.

از تنظیمات اضافه شده میتوان به بهبود امکانات جستجو بر حسب اندازه در میان تصاویر اشاره کرد که به کاربر امکان میدهد تصاویر را در اندازه های دلخواه خود جستجو کند. مثلا کاربری قصد یافتن یک کاغذدیواری برای دسکتاپ خود دارد و مایل است تصاویری را که بزرگتر از 1024*768 هستند را جستجو کند. کافی است در لیست اندازه ها, گزینه مورد نظر را انتخاب کند.

از دیگر امکانات اضافه شده میتوان از جستجو بر حسب نوع تصویر(چهره-عکس-کلیپ آرت-آیکون و…) و جستجو بر حسب رنگ (سیاه سفید, رنگی یا تک رنگ) نام برد.

Google Images Search Features

۱۳۸۸ فروردین ۲۸, جمعه

CD/DVD بر روی کامپیوترهای بدون XP نصب ویندوز

این روش بیشتر برای مینی کامپیوترهای جدید ایسوس کاربرد دارد اما برای هر کامپیوتری قابل اجراست. در صورتی که به هر دلیلی نمیتوانید از سی دی یا دی وی دی ویندوز ایکس پی بهره ببرید، این روش راهی مناسب برای حل مشکل شما می باشد.
برای این کار شما حتما باید یک نسخه ی 32 بیتی از ویندوز ویستا یا ایکس پی بر روی کامپیوتر خود داشته باشید(منظور سیستم عاملی است که در آن یو اس بی خود را آماده میکنید). مواد مورد نیاز

USB_PREP8 (alternative download)
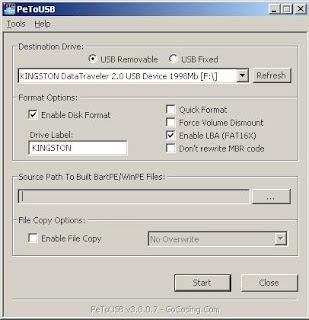
PeToUSB (alternative download)

Bootsect.exe (alternative download)


Installing Windows XP on the Asus EEE pc using a single USB flash drive.


Please note this tutorial works on all computers not just the Asus EEE PC.
To complete this tutorial you need a 32bit version of Windows XP or Windows Vista installed on your home PC.

What you'll need:
USB_PREP8 (alternative download)
PeToUSB (alternative download)

Bootsect.exe (alternative download)
Special Note: If you use the program Nlite be sure to keep the manual installation files as the USB_prep8 script relies on these files.

Extract the files in Bootsect.zip
The next step is to extract USB_prep8 and PeToUSB.
Next copy the PeToUSB executable into the USB_prep8 folder.
Inside of the USB_prep8 folder double click the executable named usb_prep8.cmd.

The window that opens will look like this:
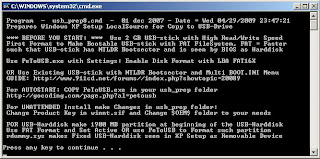
Press any key to continue

You next window will look like this:These settings are preconfigured for you all you need to do now is click start.
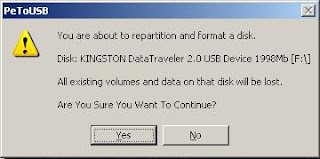
Click Yes and go on ...
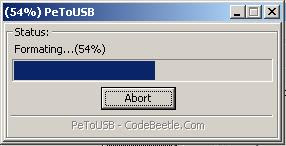
Once the format is complete DO NOT close the window just leave everything as it is and open a command prompt from your start menu (type cmd in the search bar or run box depending on your version of windows.).

Inside of the command windows go to the directory you have bootsect.exe saved.
(use the cd directoryname command to switch folders)

Now type "bootsect.exe /nt52 F:" NOTE F: is the drive letter for my USB stick if yours is different you need to change it accordingly. What this part does is write the correct boot sector to your USB stick, this allows your PC to boot from the USB stick without it nothing works.
Please note: When running the bootsect.exe command you cannot have any windows open displaying the content of your USB stick, if you have a window open bootsect.exe will be unable to lock the drive and write the bootsector correctly.

If all went well you should see "Bootcode was successfully updated on all targeted volumes."(screen shot below)
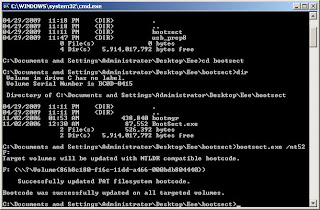
Now you can close this command prompt (don't close the usbprep8 one by mistake) and the petousb window.

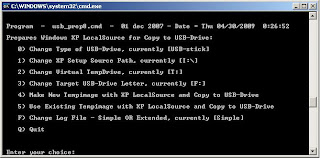
You window you see now should look like this:
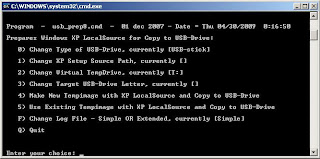
Mine looked like this : (T: as temp drive, F: as my USB and the XP directory as I:\, which was a virtual drive)If it doesn't try pressing enter.

Now you need to enter the correct information for numbers 1-3.
Press 1 and then enter. A folder browse window will open for you to browse to the location of you XP setup files (aka your cdrom drive with xp cd in)
Press 2 and enter a letter not currently assigned to a drive on your PC
Press 3 and enter the drive letter of your USB stick
Press 4 to start the process.

The script will ask you if its ok to format drive T:. This is just a temp drive the program creates to cache the windows installation files. Press Y then enter.
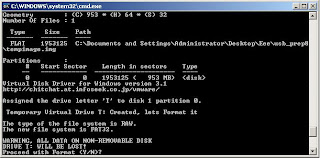
Once it's done formating press enter to continue again
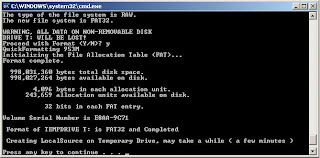
You can now see the program copying files to the temp drive it created. Once this is done press enter to continue again.
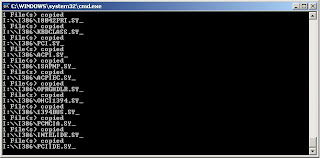
Next you will see a box pop up asking you to copy the files to USB drive yes/no you want to click yes.
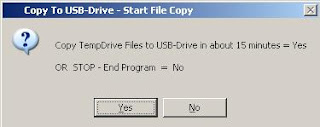
and then you will observe copying operation ...
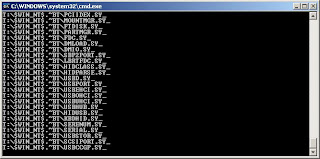
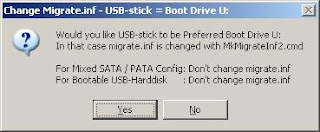
Once the script has completed copy files a popup window asking if you would like to USB drive to be preferred boot drive U: select YES on this window.
Now select yes to unmount the virtual drive.
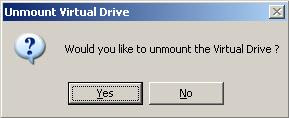
Ok we are done the hard part, close the usbprep8 window.
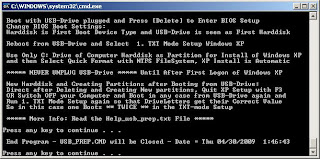
Now make sure your EEE pc is configured with USB as the primary boot device.
Insert your USB drive and boot up the EEE.

On the startup menu you have two options, select option number 2 for text mode setup.

From this point on it is just like any other windows XP installation delete/recreate the primary partition on your EEE pc and format it using NTFS. Make sure you delete ALL partitions and recreate a single partition or you will get the hal.dll error message.

Once the text mode portion of setup is complete it will boot into the GUI mode (you can press enter after the reboot if your too excited to wait the 30 seconds)

Once the GUI portion of setup is complete you will again have to boot into GUI mode this will complete the XP installation and you will end up at you XP desktop. It is very important that you DO NOT REMOVE THE USB STICK before this point. Once you can see your start menu it is safe to remove the usb stick and reboot your pc to make sure everything worked.

This method has advantages over all current no cdrom methods of installing XP to the EEE. You do not have to copy setup files in DOS to the SSD and install from there. It gives you access to the recovery console by booting into text mode setup, and it gives you the ability to run repair installations of XP if you have problems later on.

I hope this worked out for you and please post feedback to the comments section.
Please note due to the amount of comments this article has received you must now click on "Post a Comment" below the existing comments to view the most recent feedback in a popup window.

Learnt at this Source but implemented for 1000HE with extera notes that you should take care of for this version by ME

۱۳۸۸ فروردین ۱۷, دوشنبه

ترافیک تهران بر روی اینترنت

سرانجام طرح های اینفورماتیک در ایران به نتیجه میرسند و یک پروژه ی تحت وب برای نشان دادن ترافیک تهران بر روی سایت شرکت کنترل ترافیک قرار داده شده است

برای دیدن این نقشه به لینک زیر بروید